Wednesday, August 3, 2016

Buffalo Turkey Meatballs & Cucumber Tzatziki Salad


Life has been a whirlwind lately!  I have spent a lot less time cooking... and a lot more time preparing for baby "Sprout" who will be arriving in about two weeks!  Between trying to fit in the last bit of travel with "just the two of us" and preparing the house for baby's arrival, it seems like there is less and less time for spending time experimenting in the kitchen.  However, that doesn't mean that we have been relying on takeout or fast food... not in this dietitian's house!  The limited time just means that I use the following strategies to ensure that my household is eating nutritious foods while budgeting our time.
  1. Cook once for multiple meals.  Instead of spending time chopping veggies and dirtying dishes every night, make enough food to last a couple nights.
  2. Re-purpose leftovers.  Use leftover meats, beans and veggies to throw into entree salads, soups, frittatas, stir fries or tacos.  
  3. Double the recipe and freeze for later.  This can be especially useful when preparing for a big life event... perhaps the birth of a new baby, a planned surgery or care-giving for a family member. In the past few weeks I have been prepping extra and freezing different meals including various soups and stews, veggie-packed casseroles, different types of lean meatballs, whole grain pumpkin waffles and fruit and nut energy bars.  
  4. Set it and forget it!  Break out that slow cooker, prep your ingredients in the AM or the night before, then come home after a long day at work and enjoy your meal all ready to go!
  5. Simplify, simplify, simplify.  Interested in trying a new recipe that calls for all kinds of exotic ingredients?  Great, I strongly encourage this experimentation... just don't do it on a Monday after a long day of work!  Keep your weeknight meals simple, using a minimal number of ingredients :)
So that brings us back to our buffalo meatballs and tzatziki salad... a great Monday night mood booster that satisfies both #1 and #5 above, and you could absolutely double and freeze the recipe for meatballs to satisfy #3 as well.  This is a husband-approved healthy meal, and we are taking advantage of a shortcut by using bottled buffalo sauce.  Take note... any pre-made sauces, including buffalo sauces, are salty which is why we are adding minimal salt to the meatballs themselves, and why we balance the meatballs out with plenty of low sodium, potassium-rich veggies!  Balance, balance, balance...

So without further ado, let's get to the recipes!

Buffalo Turkey Meatballs
1.5lbs extra lean ground turkey
1/2 cup crumbled blue cheese
1/2 cup plain rolled oats (use gluten-free if necessary)
1/2 cup finely diced onion
3 cloves minced garlic
1tsp oregano
1/2 tsp ground black pepper
1/4 tsp salt
1 cup buffalo sauce


  1. Preheat oven to 400 degrees.  Line a baking sheet with parchment paper, or lightly coat with non-stick spray.  
  2. Combine turkey, blue cheese, oats, onion, garlic, oregano, pepper and salt and mix until well combined.  Roll into 24 evenly sized meatballs and place on prepared baking sheet.  Cook in preheated oven for 15-20 minutes, or until internal temperature reaches 165 degrees.
  3. Bring buffalo sauce to simmer in a saucepan.  Once meatballs are cooked, add to pan and turn to low until ready to serve.
Makes 24 meatballs, 6 servings of 4 meatballs each.
Nutrition per serving: 218 calories, 6gm fat, 3gm saturated fat, 317mg sodium, 13gm carbohydrates, 2gm fiber, 31gm protein

Cucumber Tzatziki Salad
2 cucumbers, spiralized or cut into thin half-moon slices
1.5 cups plain Greek yogurt, lowfat
1 clove garlic, minced
1Tb fresh dill (or 1tsp dried)
1Tb olive oil
Juice from one lemon
Salt and pepper to taste
1Tb chopped fresh parsley

Whisk together yogurt, garlic, dill, olive oil and lemon juice.  Add salt and pepper to taste.  Toss with prepared cucumber.  Sprinkle with chopped parsley.  Best if sits for at least 30 minutes before serving.  

Makes 4 servings, about 3/4 cup each
Nutrition information per serving: 102 calories, 4gm fat, 1gm saturated fat, 73mg sodium, 10gm carbohydrates, 1gm fiber, 7gm protein

Thursday, July 23, 2015

Grilled Ratatouille

Seasonal. Colorful. Healthy. Tasty. Friends. Family. Feel good. Outside. Love. Fresh. Easy. Good. Summertime.


Those are some of the words that come to mind when I think of grilling.  And at our house, we don't hesitate to throw anything on the grill, from your standard burgers and fresh fish and chicken, to fruit and veggies, to pizzas, and even salad!  Grilling is just... fantastic!

When the The Produce Box delivered a box full of eggplant, zucchini, pepper, and tomatoes, I immediately thought of one of my favorite recipes that includes all of those things... ratatouille!  But, with the thermostat creeping up closer and closer to 100 degrees, I didn't want to fire up the oven for roasted ratatouille I typically make.   Instead, we fired up the grill and got the veggies going to perfection!

First,heat your grill- we are looking for medium-high heat and an even flame.  Then, slice the eggplant, zucchini and peppers.  Chop the onions and thread onto a skewer, along with some cherry tomatoes.  Drizzle with olive oil and sprinkle with freshly ground black pepper and salt.


You will need to cook the veggies in shifts, unless you have a really big grill!  I started with the eggplant and onions.  The eggplant will only need about 3 minutes per side, but I left the onions on there throughout the duration of cooking all the vegetables so that they would be nice and tender and caramelized.


 After taking off your grilled eggplant, move onto the zucchini, peppers and tomatoes.  The zucchini and peppers took about 3-4 minutes per side.  The tomatoes cook quickly, no more than 5 minute total.


After taking all your veggies off the grill, let them cool slightly before chopping into bite-sized pieces.  Chop some fresh summer herbs to add to the mix (I used about 1/2 cup total of freshly chopped parsley, basil and oregano).  Finish off with about 2Tb high quality balsamic vinegar.

Sweet and smoky perfection...

Grilled Ratatouille
2 Eggplant, sliced into 1/2 inch rings
2 peppers, halved lengthwise
2 zucchini, halved lengthwise
1 sweet onion, chopped and skewered
1 pint cherry tomatoes
Olive oil
Salt and Pepper
3-4Tb chopped fresh basil
3-4Tb chopped fresh parsley
1 sprig fresh oregano, leaves removed
2Tb balsamic vinegar

1. Heat grill to medium high heat.
2. Drizzle vegetables with olive oil and sprinkle with freshly ground black pepper and salt.
3. Cook vegetables on preheated grill.  Eggplant need about 3 minutes per side.  Peppers and zucchini need about 3-4 minutes per side.  Tomatoes cook quickly, about 4 minutes total, turning skewers to evenly roast.  Onions need the longest, about 10-15 minutes, turning the skewers to get an even browning.  
4. After veggies are removed from heat and have a chance to cool slightly, chop the onions, peppers, zucchini and eggplant into bite-sized pieces.  Stir in tomatoes, fresh herbs and balsamic.  
Enjoy with a healthy grilled protein such as chicken, fish, lean meat or vegetable burger (see my recipe for black bean burgers)!

Monday, June 29, 2015

Roasted Summer Herb Eggplant Rollups

"What can I do with eggplant?"  This is a question I have been hearing my clients ask often in the past couple weeks.  And it's no big surprise as to why.  This is the time of year when the large aubergine vegetables are hanging heavy on the plants in home gardener's back yards... or where you see several different varieties at the local farmer's markets!  


Beautiful to look at... and delightful to eat!  And while I am always a fan of a nice roasted eggplant ratatouille, one of my favorite ways to eat eggplant is to use them in place of lasagna noodles for a yummy Italian style dish.  This is a great option for meatless Mondays!  While this is an old favorite of mine, the recipe is adjusted slightly to use even more of the delicious summer herbs I have growing in my garden!


Once you select your gorgeous eggplants, thinly slice them lengthwise, add some olive oil, and roast to soften.


Meanwhile, make your filling: just a quick stir of ricotta, mozzarella, garlic, spinach, basil, oregano and parsley, plus a pinch of salt and pepper.

 Assemble your roll ups...


Then, top with marinara and bake until bubbly and delicious!


Serve with a colorful green salad... yum yum!


Roasted Summer Herb Eggplant Rollups
Makes 6 servings: 3-4 rolls ups per serving

2 medium eggplants, thinly sliced lengthwise
2 Tb extra virgin olive oil
2 cups part skim ricotta cheese
1 cup part skim shredded mozzarella
1 cup chopped fresh spinach
1/4 cup chopped fresh basil
2Tb chopped fresh parsley
1Tb chopped fresh oregano
2 garlic cloves, minced
1/4 tsp ground black pepper
1/4 tsp salt
2 cups homemade or store-bought marinara

  1. Preheat oven to 350 degrees.  Lightly coat baking sheet with non stick spray.  Lay eggplant slices out evenly on the baking sheet.  Drizzle with 2Tb olive oil and spread evenly on eggplant with fingers.  Roast in preheated oven for 15 minutes or until tender.  Set aside to cool.
  2. Meanwhile, in a medium bowl mix together ricotta, mozzarella, chopped spinach, basil, oregano, garlic and salt and pepper.
  3. Lightly coat 13x9 baking dish with non-stick spray or olive oil.  Increase oven temperature to 400 degrees.  
  4. When eggplant is cool enough to handle, place 1 rounded Tb cheese mixture at the end of each eggplant slice.  Roll eggplant up into a roll with the cheese inside.  Place eggplant rolls in prepared baking dish side by side.  Pour marinara sauce over top.  Bake in preheated oven until hot and bubbly, about 20 minutes.
Nutrition information per serving: 303 calories, 16gm fat, 23gm carbohydrates, 17gm protein


Sunday, February 1, 2015

Peanut Butter Protein Bars (No Bake!)


Here's a quick and easy snack recipe that sure does beat the processed protein and granola bars you find in the grocery store.  Feel free to adjust the ingredients to suite your taste preferences... for example, you could try almond, cashew, or sunflower butter instead of the peanut butter.  Or, try shredded coconut instead of the cocao nibs.  Or, try a chocolate protein powder if that's your thing!
 
First, we are going to get the sweetness from the natural sugars in dates.  Soaking the dates prior helps add a little moisture to the bar to help it stick together. 
 

Meanwhile, blend your oats and protein powder in a food processor.  Then, add in your peanut butter, dates and cinnamon. 


Add water as needed until mixture sticks together.  Then press your mixture into your baking dish.  Sprinkle your cocao nibs on top, then press into the mixture. 


Freeze until firm, then slice into your squares.  Enjoy as a snack or as a pre-workout boost!


Peanut Butter Protein Bars (No Bake)

1 1/2 cup Oats
1/2 cup vanilla protein powder
 3/4 cup natural peanut butter
1 cup pitted dates
1 tsp Vanilla extract
1/3 cup Water, or as needed
1/4 tsp Cinnamon
3Tb cocao nibs

1. Soak dates in water for 30 minutes, or until softened. Drain and set aside.
2. Blend oats and protein powder in a food processor. Add dates, peanut butter, vanilla and cinnamon.  Blend, then add water, 2Tb at a time until mixture sticks together.
3. Flatten into bottom of 8x8 pan. Sprinkle cocao nibs on top and press into mixture.
4. Freeze 30 minutes until firm, then cut into 16 squares. Store in refrigerator.

16.0 servings)
 
175.8
Total Fat 7.8g12%
  Saturated Fat 2g10%
Cholesterol 0.6mg0%
Sodium 76.9mg3%
Total Carb 19.4g6%
  Dietary Fiber 3.4g14%
  Sugars 4.5g 
Protein 8.6g17%
Vitamin A 3%Vitamin C 3%
Calcium 5%Iron 6%
*Percent Daily Values are based on a 2,000 calorie diet. Your daily values may be higher or lower depending on your caloric needs.

Friday, January 23, 2015

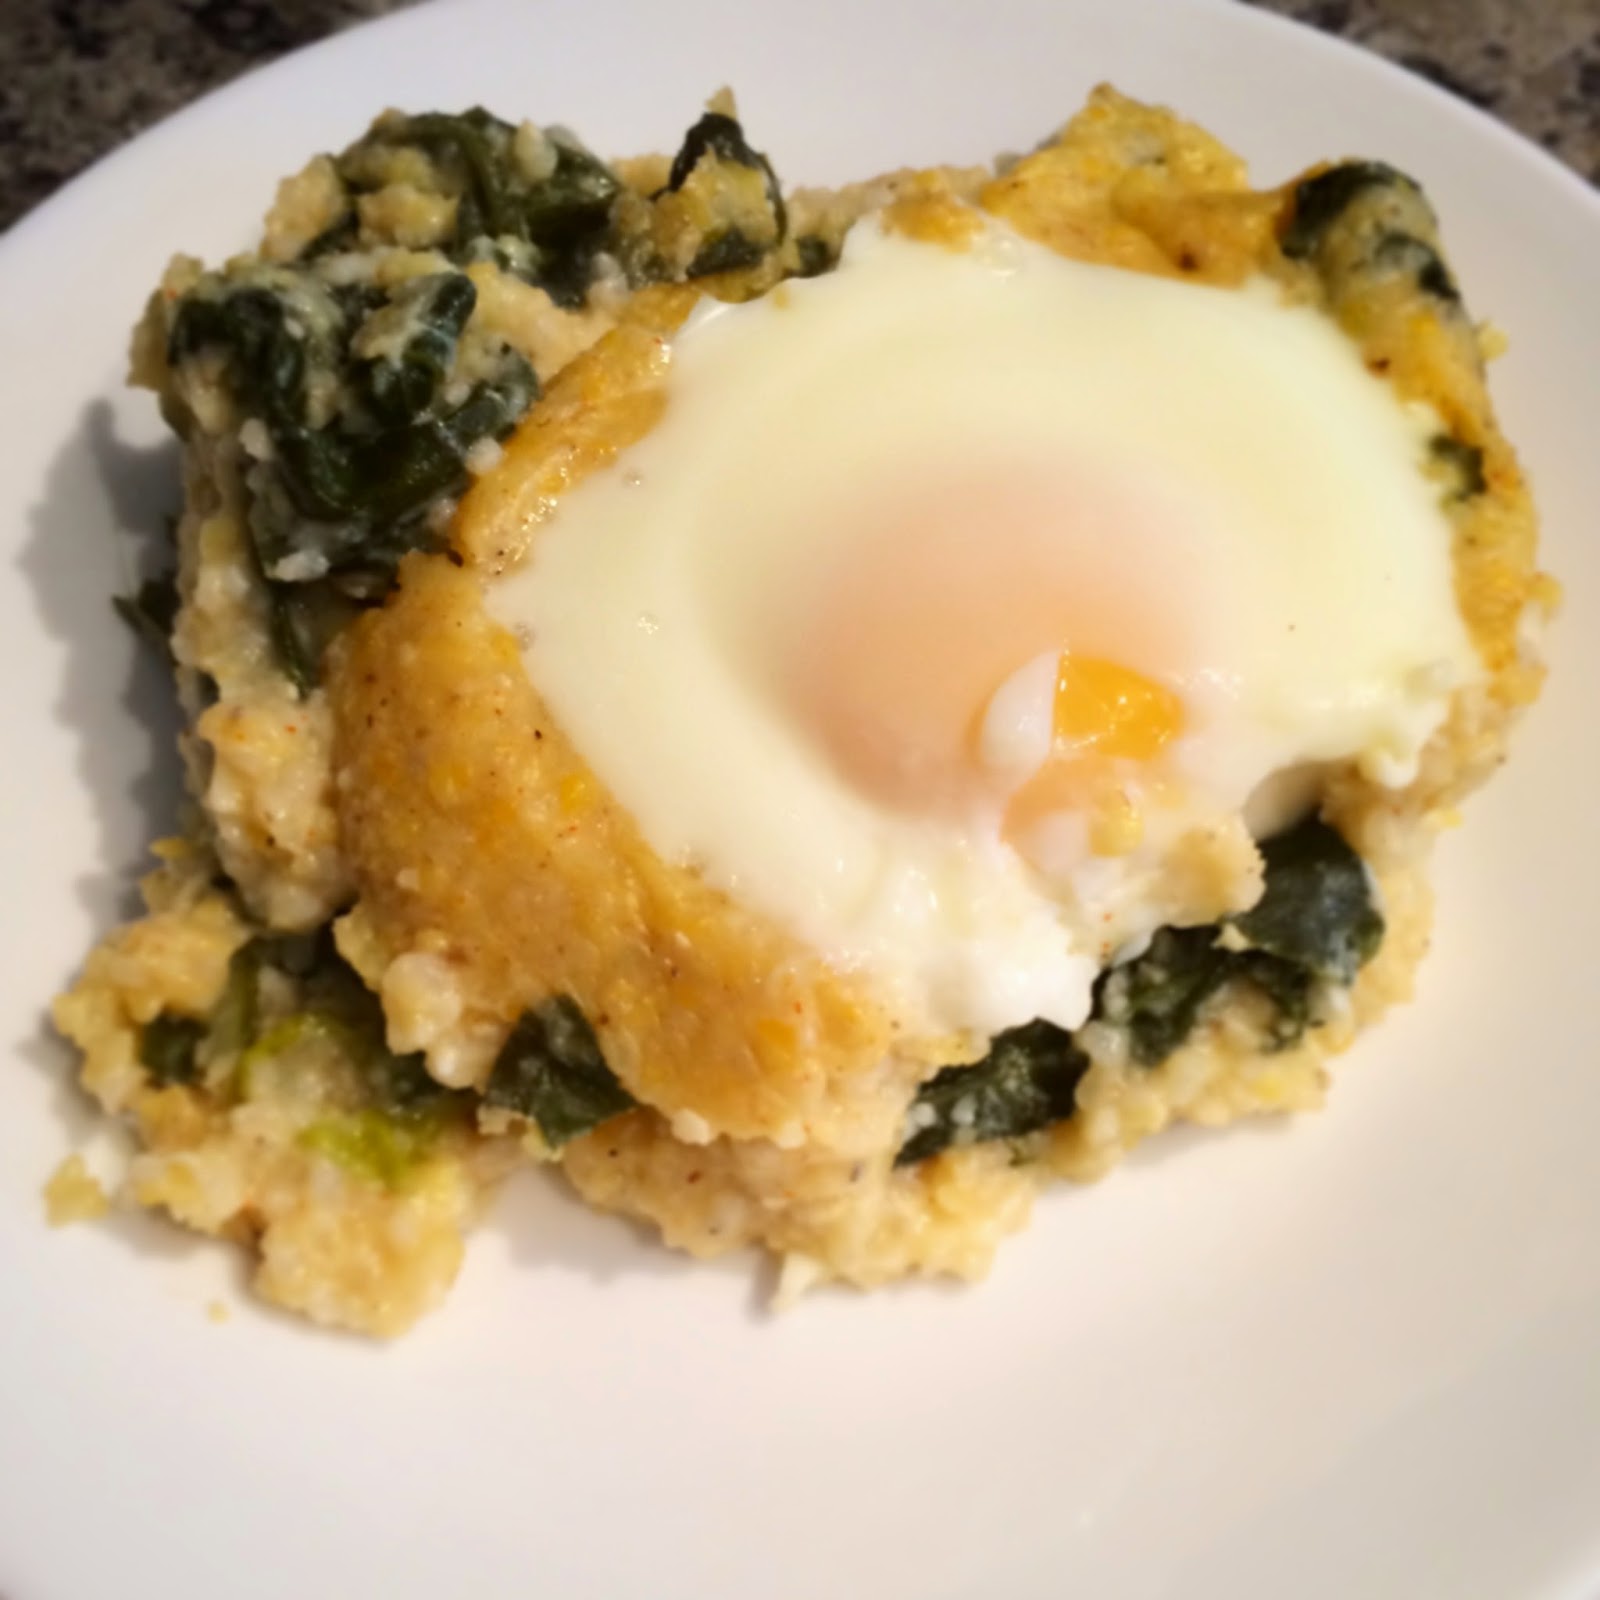
Greens N Grains Breakfast Bake


I've been meaning to post this recipe for a while.  I always look forward to making this dish because it provides a nice break from my typical weekday breakfast routine (oatmeal, frittata, protein pancakes, oatmeal, frittata, protein pancakes...).  Y'all know by now that I love my bulk breakfast recipes to prep ahead of time on the weekend... and then I have my easy breakfast ready to heat and eat during the busier work week. 

This recipe can prepared for a beautiful Sunday brunch, and leftovers stay delicious and ready to portion out for your quick weekday breakfast. 

And of course, no meal is complete without beautiful, colorful, nutrient-rich, fiber-rich vegetables!  Seeing a little green on your plate just makes you feel good about yourself ;) 

So, that being said, start by cooking down a batch of greens- I prefer collards for this recipe.  You can cook them any way your prefer, but I like cooking in a pan with about 2Tb water. 


Next, prepare 1 cup whole grains of choice according to package directions.  I am loving Bob's Red Mill "Mighty Tasty Hot Cereal" for this... a blend of whole grain brown rice, corn, sorghum and buckwheat.  But you could use millet, polenta or even stone ground grits.

 
Whisk your milk with salt and pepper, red pepper flakes, and two eggs.  Stir into cooked grains, along with cheese and butter. 
 
 
Fold about 3 cups of the cooked collards into your cheesy grains.
 
 
Lightly coat 13x9 baking dish with non-stick spray.  Spread your mixture in and bake in preheated oven.
 
 
When grains and greens are set, remove from oven and use the back of a spoon to make 8 indentations in your casserole.  Crack eggs 1 at a time into the indents.  Bake another 12 minutes (for soft cooked eggs) or 15 minutes for more firm egg yolks.  Remove from oven, cover loosely with aluminum foil and let stand another 10 minutes before enjoying.  Great with hot sauce!


Greens N Grains Breakfast Bake
8 servings


1 bunch collards, washed and leaves torn into bite-sized pieces
1 cup Bob's Red Mill "mighty tasty hot cereal" (or stone ground grits, millet, polenta)
Water
1/2 cup skim milk
1/2tsp ground black pepper
1/2 tsp salt
1/4 tsp red pepper flakes
1 cup shredded low fat cheddar cheese
2Tb butter
10 large eggs

1. Preheat oven to 375 degrees.  Lightly coat 13x9 baking dish with non-stick spray.  Set aside.
2. Cook collards, covered in large pan with 2Tb water until wilted down.  Set 3 cups aside.
3. Cook 1 cup whole grains in water according to package directions.
4. Whisk milk with black pepper, salt, red pepper flakes, and 2 eggs.  Whisk milk mixture into cooked grains along with cheese and butter.
5. Stir cooked greens into grain mixture.  Spread evenly in prepared baking dish and bake 25-30 minutes, or until set.
6. Remove dish from oven and use back of spoon to make 8 indents.  Crack 8 remaining eggs- one into each indent.  Bake another 12 minutes (for soft cooked eggs) or 15 minutes for more firm egg yolks. 
7. Remove from oven, cover loosely with aluminum foil and let stand another 10 minutes before enjoying.

Recipe Facts

8.0
20 minute(s)
40 minute(s)
 
Nutrition Facts 
268.8
104.3                                                              % Daily Value*
Total Fat 11.9g18%
  Saturated Fat 4.9g24%
Cholesterol 271.3mg90%
Sodium 352.3mg15%
Total Carb 23.3g8%
  Dietary Fiber 4.2g17%
  Sugars 1.4g 
Protein 17.1g34%
Vitamin A 127%Vitamin C 22%
Calcium 23%Iron 16%
*Percent Daily Values are based on a 2,000 calorie diet. Your daily values may be higher or lower depending on your caloric needs.
 

Thursday, November 27, 2014

Southwest Turkey Soup


Here it is, just in time for all the turkey leftovers that will be found tucked in the fridge tomorrow.  If your family is anything like mine, Dad will buy THE biggest turkey he can find... even if it's just to feed a family of four.  And there are always a tremendous amount of leftovers.  As many turkey sandwiches as we can eat, and we still can't get through all the deliciousness.

My  advice... take your leftover turkey, make this soup and freeze at least half.  Then you have a healthy meal ready to go in the next few weeks when you are in the midst of holiday crunch time!  And, it's always nice to add a little variety to your leftovers.

Today, and everyday, I am thankful for all of you reading this!  I hope everyone has a beautiful Thanksgiving Day, and you find the time to truly count your blessings.   Here's to our good health!  This one goes out to all the soup guys out there...

Turkey Tortilla Soup
2 Tb olive oil
2 bell peppers, diced
1 onion, diced
2 celery stalks, diced
3 cloves garlic, minced
1Tb chili powder
1Tb cumin
1Tb fresh oregano (or 1tsp dried)
1tsp ground coriander
¼ tsp salt
½ tsp ground black pepper
4 cups chopped leftover turkey
32 ounces low sodium chicken broth
2 cans diced tomatoes, no salt added
1 can black beans, rinsed and drained

1 cup frozen corn kernels

  1. In a large saute pan, heat olive oil over medium heat.  Add the bell peppers, onion, celery and garlic.  Saute over medium, stirring frequently, until veggies are tender, about 10 minutes.  
  2. Stir in your spices: chili powder, cumin, oregano, coriander, salt and pepper.  
  3. Then add your vegetable mixture to your crock pot, along with your leftover turkey (yay leftovers!), chicken broth, tomatoes, black beans and corn.  Cook on low for at least 4 hours.  
  4. Enjoy with a dollop of guacamole, fat free Greek yogurt, and a sprinkle of cilantro.  

Monday, November 24, 2014

Curried Cashews


As you are gearing up for Thanksgiving travel and black Friday shopping, remember to plan ahead to stay on track with your healthy eating plan.  Nuts make a great portable snack- buy individual pre-portioned packs to store in your car, carry on, purse, or pocket. Or, better yet... make your own roasted nuts and portion about 1/4 cup in snack-sized bags. 

Try this yummy, warm and toasty recipe to keep on hand for when you are out and about this week.


Curried Cashews
Makes about 12 servings (1/4 cup each)

3 cups unsalted, raw cashews
3Tb lemon juice
2Tb curry powder
1tsp turmeric
1Tb coconut sugar
1tsp salt
1/4 tsp cayenne

Preheat oven to 300 degrees.  Line baking sheet with aluminum foil. 

Whisk together lemon juice, curry, turmeric, coconut sugar, salt and cayenne.  Pour over cashews and toss until evenly coated.  Spread evenly on baking sheet.  Cook in preheated oven for 20-25 minutes until browned, stirring every 10 minutes. 

Let cool completely.  Stir in airtight container.

Recipe Facts

12.0
1/4 cup
5 minute(s)
20 minute(s)
Nutrition Facts per serving (40)g
Calories: 203.8
Fat Calories: 141
Total Fat 16g
  Saturated Fat 3.2g
Cholesterol 0mg
Sodium 200.1mg
Total Carb 12.8g
  Dietary Fiber 1.4g
  Sugars 2.6g
Protein 5.4g
   
24% Carb
10% Protein
66% Fat


Thursday, October 30, 2014

DIY Honey Mustard Almonds


Just a handful a day!!!
It's no secret that almonds are a healthy snack.  The mono-unsaturated fats help to optimize our serum cholesterol levels, and along with the fabulous fiber, phytochemicals and antioxidants that almonds provide, may help us decrease our risk for cardiovascular diseases. 

Just 1 ounce of almonds (about 24), also provides us with ~7gm of protein, roughly the amount in 1 egg.  This combination of protein, fiber and fats makes for a great satiating snack between meals.  And the best part is that nuts are wonderfully portable- keep a small baggie in your desk, car or purse so that hunger is never an excuse to stop for a less optimal meal.  

And the greatest part about making your own? DIY is much more economical than shelling out anywhere from 3-7 bucks on each small container of nuts in the grocery store!

Start by whisking together your honey mustard mixture... 


Then, toss your almonds in the sauce until well coated.  


Then, you just spread evenly on your prepped backing sheet, and cook at 300 degrees, stirring every 10 minutes until almonds are fragrant and browned, about 30 minutes total.


Soooooo, easy right??!!

Honey Mustard Almonds
3 cups raw almond
1/4 cup honey (preferably local)
1Tb Dry Mustard Powder
1/2 tsp salt
1/2 tsp paprika

1.  Preheat oven to 300 degrees.  Line baking sheet with parchment paper or foil and lightly coat with non-stick spray.
2. Whisk together honey, mustard, salt and paprika.  Pour over almonds and mix well to evenly coat. 
3. Spread almonds on baking sheet and bake for 25-30 minutes until slightly browned, stirring every 10 minutes.
4. Pour almonds into shallow container to cool.  Stir frequently to keep the almonds from sticking together when cooled.  Store in an airtight container for about a week.

Recipe Facts

 12.0
 1/4 cup
 10 minute(s)
 30 minute(s)
Nutrition Facts per serving (38)g
Calories: 191.7
Fat Calories: 132
Total Fat 15g
  Saturated Fat 1g
Cholesterol 0mg
Sodium 97.2mg
Total Carb 10.9g
  Dietary Fiber 4g
  Sugars 6.8g
Protein 7g

21% Carb
14% Protein
65% Fat

Monday, October 27, 2014

Spice Sweet Potato Protein Pancakes

I am up to my neck in sweet potatoes right now... stocked up big time at Drumberheller's Orchard when we were last in VA.  I am not complaining... love me some sweet potatoes and the versatility they lend themselves to in all kinds of recipes.  Roast them with some chili powder and cayenne for a smoky sweet side dish, or "bake" in the microwave and stuff with black beans, cheddar and salsa for a vegetarian quick meal, or add a little cinnamon and pumpkin pie spice for a sweeter twist.  

I went with the latter option in my spiced protein pancakes.  I've posted on protein pancakes before- they are quick, they are nutritionally balanced, they freeze well, and even picky eaters won't notice the difference between these and your classic, "out of the box" pancake variety!  

I personally always double the recipes for a grab-n-go breakfast option for the work week.  

And to keep with the Fall flavor profile I have been LOVING over the past couple weeks, I made a quick pumpkin-y topping in lieu of dousing these babies in syrup.  

So, here ya go... quick and easy... start by throwing all your pancake ingredients into a food processor (oats, eggs, mashed sweet potato, cottage cheese, baking powder, cinnamon, pumpkin pie spice, maple syrup).  


And blend until smooth... use a rubber spatula to scrape the sides of the bowl as needed.


Next, use 1/4 cup measuring cup to portion out pancake mixture onto hot skillet.  Use  a spoon to smooth down into a pancake- the batter will be thicker then your run of the mill, boxed (read nutritionally-void) pancake mix.  Keep heat to medium low, and after 3-4 minutes (or when pancakes start to firm and brown), flip and cook the other side.


The recipe will make about 12 pancakes (4 servings, of 3 pancakes each).  


Meanwhile, while your pancakes are cooking, you can make your topping.  Whisk together 1/3 cup plain, non-fat Greek yogurt, and 1/4 cup jarred pumpkin butter.  Yup, it's that easy folks.  While pumpkin butter does have added sugars, we are keeping the portion minimal (just 1Tb per serving), and we are adding the protein-packed Greek yogurt to help the sweet flavor go a little further.  


Next, all you do is plate your pancakes, drizzle the pumpkin-yogurt topping over top, and sprinkle with a few pepitas (hulled pumpkin seeds) for a little crunch... not to mention some extra healthy fats and protein :)


Spiced Sweet Potato Protein Pancakes
Makes about 12 pancakes (4 servings)

1 cup cooked, mashed sweet potato
1 cup oats
1 cup fat-free cottage cheese
2 eggs
1Tb maple syrup
1tsp pumpkin pie spice
1tsp cinnamon
1tsp baking powder
1/3 cup nonfat Greek yogurt
1/4 cup pumpkin butter
4Tb pepitas (hulled pumpkin seeds)

1. Add sweet mashed sweet potato, oats, cottage cheese, eggs, maple syrup, pumpkin pie spice, cinnamon and baking powder to food processor.  Blend until smooth, scraping bowl with spatula as needed.
2. Heat skillet over medium-low heat.  Add 1/2tsp coconut oil, then spoon out ¼ cup pancake batter and use a spoon to smooth into a circle.  Repeat with batter until you have about 4 pancakes in your skillet.  Cook about 4 minutes, per side and flip.  Repeat with remaining batter until all pancakes are cooked

3. Meanwhile, whisk together yogurt and pumpkin butter.  Use as a topping for pancakes, along with a  sprinkle of pepitas.  

Recipe Facts

 4.0
 About 3 pancakes
 5 minute(s)
 15 minute(s)
Nutrition Facts per serving (240)g
Calories: 319.3
Fat Calories: 70.4
Total Fat 8g
  Saturated Fat 1.8g
Cholesterol 106.7mg
Sodium 377.5mg
Total Carb 44.6g
  Dietary Fiber 5.2g
  Sugars 17.6g
Protein 18.7g
55% Carb
23% Protein
22% Fat

Thursday, October 23, 2014

Southwestern Sweet Potato Souffle


After spending a weekend in the mountains of Schuyler, VA earlier this month, Sonny and I made our usual trip to Drumheller's Orchard where we STOCKED up on all kinds of apples and sweet potatoes.  I haven't had a chance to make any apple recipes yet (hoping I can get to that next week), but the Fuji apples have made some wonderful snacks!

I have managed to tap away at some of my sweet potato stock- we've roasted, mashed and baked, and I'm planning on making some sweet potato protein pancakes for tomorrow.  And this healthy casserole-style meal I made last week is definitely worth sharing.  The recipe is packed with nutrient-dense vegetables- but no one will consider this "health food" when noshing through the smoky-sweet, flavor-packed bites!

First, start out by steaming your chopped carrots and sweet potatoes- the carrots will take a little longer to steam so start with just the carrots and add the potatoes about 15 minutes in.  Reserve some of your steaming liquid, about 1/2 cup.  


While your skin-loving, beta-carotene rich veggies are cooking, start on your sauteed vegetables.  This recipe is all... "veggies on veggies on veggies!"  Heat a large (like, the largest you have) saute pan or even sauce pan with your oil, then add in your onion, bell pepper, mushrooms and garlic.  Saute over medium until veggies are tender and onions are translucent.  Stir often so garlic does not burn.  When vegetables are soft and beautiful, turn off the heat and stir in your beans and corn.  


Then, when your orange vegetables are fork tender, transfer them to a large bowl.  Add in 1/2 cup reserved steaming liquid and beat with a hand mixture until mostly smooth... small chunks of carrots and sweet potato are A-ok!  Then, add in your eggs, chili powder, cumin, salt and ground black pepper.


Lightly coat a 9x13 baking dish with non-stick spray or olive oil.  Stir the shredded cheddar and your sauteed veggie-bean-corn blend into the mashed sweet potato mixture, and spread into your prepared baking dish.  Place that bad boy in the oven, and take care- that dish will be heavy!


Bake until set and browned on top.... you will know it's ready when your house smells like southwestern paradise and your mouth is uncontrollably watering.  


For a dose of heart-healthy fat, and yummy creamy goodness, I added a dollop of guacamole.  And since this was a refuel meal after a tough squat-packed workout, I also added a poached egg for an additional protein punch.  So good, so good, so good.


Southwestern Sweet Potato Souffle

3 cups peeled and chopped sweet potatoes
2 cups peeled and chopped carrots
3 eggs, slightly beaten
1Tb chili powder
1Tb cumin
¼ tsp salt
¼ tsp ground black pepper
2Tb olive oil
1 onion, diced
1 bell pepper, diced
8oz mushrooms, diced
2 cloves garlic, minced
1 can black beans, rinsed and drained
1 cup frozen corn kernels
1 cup sharp cheddar cheese. 

1. Preheat oven to 375 degrees and lightly coat 13x9 baking dish with non-stick spray.  Set aside.
2. Steam carrots and sweet potatoes until fork tender- carrots will require a slightly longer steaming time, so start them and add the sweet potatoes 15 minutes later.  Reserve ½ cup steaming liquid.
3. With a hand mixer, beat the steamed potatoes and carrots with the ½ cup reserved liquid until fairly smooth (some chunks remaining are fine).   Then, add in one beaten egg at a time, along with chili powder, cumin, salt and pepper.  Mix until well combined. 
4. While sweet potatoes and carrots are steaming, start on your veggies.  Heat olive oil over medium low in large sauté pan.  Add onion, bell pepper, mushrooms and garlic and cook until tender, about 10 minutes, stirring occasionally.  Remove from heat and stir in beans and corn. 
5. Stir veggie mixture into mashed sweet potatoes.  Stir in cheese and spread evenly in prepared baking dish.  Bake at 375 for about 35 minutes until slightly browned on top.

6. Serve with mashed avocado and a poached egg on top.